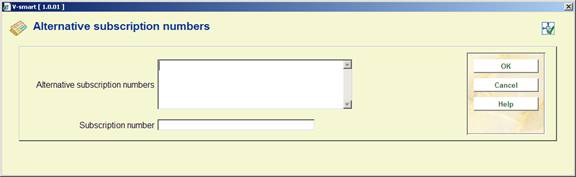
From the Subscription general data screen, select the option. The system displays the Alternative subscription numbers screen.
Alternative subscription numbers - multiple alternative subscription numbers may be entered separated by commas. These alternative subscription numbers are indexed (in the Alternative subscription number index) and only have to be unique within the subscription.
Subscription number – use this field when you want to change the original subscription number to a new number. The new number displays on any screen where the subscription number is displayed. Searching (using the Subscription number index) is possible using either number. The original and subsequent subscription numbers must be unique across the serials institution.
If you want to use the full binding functionality, you must first set up the binding information for a subscription. This is done via the option on the Binding units summary screen.
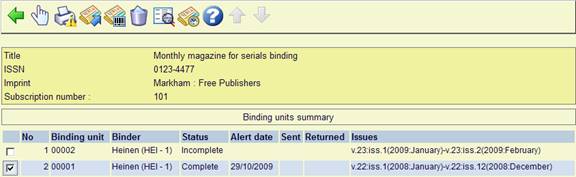
From the Subscription general data screen, select the option. The system displays the Binding units summary screen.

Binding unit: number identifying a binding unit. A binding unit contains all of the issues that are sent to the binder to be bound together.
Binder: supplier (defined in AFO241).
Status: there are three possible statuses: Incomplete (binding unit does not contain the number of issues required to bind), Complete (binding unit contains the number of issues required to bind and all issues are received), Missing issues (binding unit contains the number of issues required to bind but some of the issues are not yet received).
Alert date: date that the binding alert was produced.
Sent: date that this binding unit was sent to the binder.
Returned: date that this binding unit was returned from the binder.
Issues: issues that are contained in this binding unit.
: Choose one of the binding units displayed on the screen to display/update its details. Please refer to section 321.3.5.3.
: Use this option to reprint a binding alert or binding slip. If the binding unit has not yet been sent to the binder, a binding alert is produced. Otherwise, a binding slip is produced.
: Use this option to send a binding unit to the bindery. Please refer to section 321.3.5.2.
: Use this option to receive bound issues back into the library from the bindery. Please refer to section 321.3.5.4.
: Use this option to delete a binding unit that does not contain the correct issues. The system will reset the statuses in each of the issues in the binding unit to “Received”. The system will warn you if the binding unit has already been barcoded but will still allow you to delete the binding unit. Once the binding unit has been deleted, you can create a new binding unit containing the correct issues using the Send issues to bindery option on the Receipt information screen.
: This form contains general information and needs to be setup before the system can generate binding alerts. Please refer to section 321.3.5.1.
: Use this option to deal with issues that were either already out at the bindery or bound but not barcoded before the was defined. Please refer to section 321.3.5.5.
: This form contains general information and needs to be setup before the system can generate binding alerts. After selecting this option an input form will be displayed:

Binding alert flag: if set, this subscription should be bound and binding alerts will automatically be produced in Serials checkin. If this flag is not set, issues can still be bound using the Send issues to bindery option on the Receipt information screen but binding alerts and binding units will not automatically be created/updated by the system as issues are received in the system
Description: the type of holding of the issues that are to be bound
Issues in binding unit (# issues): number of issues that are to be bound together and make up a complete binding unit. Changing this field will only affect the current (incomplete) binding unit and any future binding units.
Binding delay(# issues): use this field to delay the production of a binding alert until after the specified number of issues is received. If left at zero (or null), the system will produce a binding alert to staff in Serials checkin as soon as the last issue of the binding unit is received (i.e. if Issues in binding unit is set to 6, when the sixth issue is received). If set to 1, the binding alert will not be produced until the first issue in the next binding unit is received.
Binder: supplier (defined in AFO 241) that that issues will be sent to
Binding notes: general notes to the binder about this subscription
Binding color: general details to the binder about the color of the binding for this subscription
Staff notes: include any internal notes that pertain to the binding of this subscription. i.e. if the binding unit should also contain the annual index.
Note
The Shelfmark set general form accessed from the Holdings statements for shelfmark sets screen also contains the fields: # issues to bind, binding color and binding notes. These fields are information only fields and are not related to the fields set up on this form.
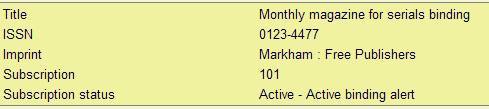
Once this information has been defined, ths subscription status information in the header of the Subscription general data screen will show that binding alerts are active:
The Binding units summary screen will display one or more units that are eligible for sending to binder:
: Use this option to send a binding unit to the bindery. After selecting this option an input form will be displayed:
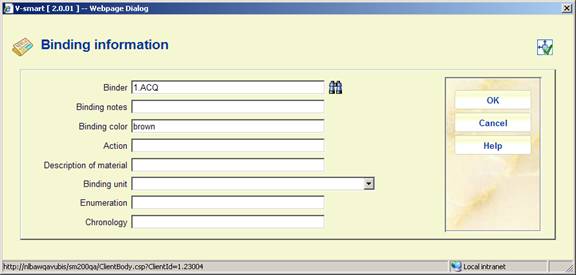
Binder: supplier (defined in AFO 241) that issues will be sent to (defaults from the General info).
Binding notes: general notes to the binder about this subscription (defaults from the General info).
Binding color: general details to the binder about the color of the binding for this subscription (defaults from the General info).
Action: action note to the binder relating specifically to this binding unit.
Description of material: free text description of the issues in this binding unit.
Binding unit: Select the correct binding unit from the dropdown list. If you do not select a binding unit, the system will create a new one.
Enumeration: numbering information for this binding unit.
Chronology: date information for this binding unit.
If any of the issues is already barcoded, you must first remove (delete) the barcodes. You can do this from the Receipt information screen, Item summary screen, etc.
If any of the issues in the binding unit is not yet received, the system displays a message that some of the issues are missing and asks if you still want to proceed. Click to continue.
The system displays the Binding information form. Make any necessary changes to the form and then click to send the binding unit to the bindery and produce a binding slip which can accompany the material to the binder.
The system updates the status of the issues in the binding unit to ‘in bindery'.
: Choose one of the binding units displayed on the screen to display/update its details. After selecting this option an input form will be displayed:

Binder: supplier (defined in AFO 241) that issues will be sent to (defaults from the General info).
Binding notes: general notes to the binder about this subscription (defaults from the General info).
Binding color: general details to the binder about the color of the binding for this subscription (defaults from the General info).
Action: action note to the binder relating specifically to this binding unit.
Description of material: free text description of the issues in this binding unit.
Enumeration: numbering information for this binding unit.
Chronology: date information for this binding unit.
Alert date: date that the binding alert was produced.
Sent date: date that this binding unit was sent to the binder.
Return date: date that this binding unit was returned from the binder.
Issues: issues that are contained in this binding unit along with their statuses.
If you change information in the Binder, Binding notes or Binding color fields, the system displays a message:
The Binding units summary screen will display one or more units that are eligible for returning from binder:

: Use this option to receive bound issues back into the library from the bindery. The system asks if you want to barcode the bound issues.

If you click , the system will display the “Add a new item” form. After entering a barcode and clicking on this form, the system changes the status of the selected issues to ‘Bound'.

A bound label can be assigned to a barcoded item when it is added to the system. This bound label displays instead of the enumeration and chronology of the parts (issues) attached to the barcode. When a barcoded item is added to the system that has the same parts as another barcode, the system will default the bound label from the other barcode. This feature allows for consistency of bound labels across a title.
If you answer to the “Do you want to barcode the bound issues?” prompt, the system changes the status of the selected issues to ‘Bound'. If you answer , the system does nothing.
The system then redisplays the Binding units summary screen:

: Use this option to deal with issues that were either already out at the bindery or bound but not barcoded before the was defined. After selecting this option a summary screen will be displayed:
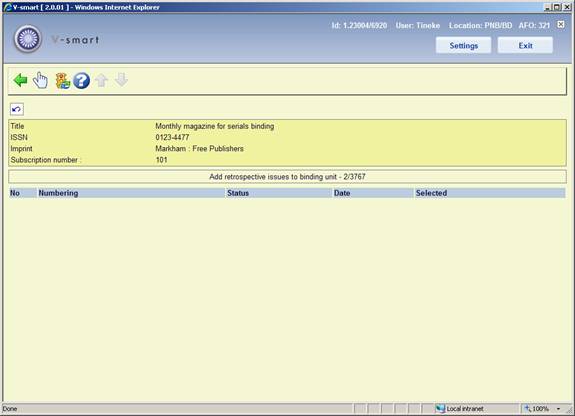
Use the option to select the issues that you want to include in a binding unit. The value in the Selected column will toggle from No to Yes. When all of the issues for one binding unit are selected, use the option . The system displays the Binding information form. Make any necessary changes to the form and then click . The system creates a new binding unit and marks the binding unit as already sent. No binding slip is produced. The new binding unit will then appear on the Binding units summary screen and can be returned from the bindery and barcoded.